Total Pageviews

Wednesday, May 11, 2016

Louisiana Crawfish Boil


Louisiana Crawfish Boil

Ingredients
Recipe makes 5 Servings
18 Oz Zatarain's Crawfish, Shrimp & Crab Boil
16 Oz liquid boil concentrate
3 large white onion
25 Lb live crawfish
2 1/2 Lb red C potatoes
6 ears of corn, shucked and halved


Bring water to a boil and add a large bag of powdered crawfish boil (4.5 lb. bag), a large bottle of liquid boil (16 oz.), 3 large onions (quartered). Boil for 20 to 30 minutes.

Meanwhile, clean crawfish using two (2) 5 gallon buckets, 1 that has holes, 1 that doesn't. Rinse until water runs clear, about 4 to 6 times.

Once the liquid has boiled, add potatoes and corn, bring back to a boil, and cool for 10 minutes.

Add crawfish, Boil for an additional 3 minutes.

Turn off heat. Leave pot covered and let sit 10 minutes.

Strain everything, using the basket in the pot, and serve.

Crawfish Boil

Easy Crawfish Boil


Ingredients (Recipe makes 4 Servings)
2 Lb live crawfish
1 large onion, peeled and cut into quarters
3 Oz Crawfish, Shrimp & Crab Boil Seasoning Mix
1 lemon, sliced in half
1 Lb red potatoes, cut into quarters
4 ears of corn, each cut into 3 pieces

Instructions
At least 1 hour prior to cooking, place crawfish in an ice chest and fill with fresh water. Add 2 tablespoons salt, stir the crawfish around, let sit for 15 minutes, then drain and repeat.

After second time draining refill with water and no salt and let sit for 10‑15 minutes. Remove any dead crawfish, then drain and set aside.
Fill an 8‑quart pot with 4 quarts water. Add seasoning mix, lemon, onion and potatoes. Bring mixture to a boil over high heat and cook for 15 minutes.
Add corn to boiling mixture and cook for 3 minutes, then add crawfish to pot and cook for 5 more minutes.
Turn off heat and let crawfish sit—the longer they sit the better they get!
Remove pot from heat and drain water.

Crawfish Tips

Whether you're curious about these tasty Cajun delights or you throw the best crawfish boil on the block, our crawfish guide has everything delish for crawfish.


Crawfish Handling Tips 
  • Make sure to ice and cover the crawfish while transporting from the store to home. It's important to keep the crawfish moist and cool. Best practice is to transport and store in a large cooler.
  • Do not put crawfish in the back of a hot truck or the trunk of a car without being covered or iced as the sudden temperature change is harmful to the crawfish.
  • Keep crawfish iced and covered until ready to cook. If crawfish are going to be kept overnight put them in a cooler and cover crawfish (in the bag) with a wet cloth or newspaper and put some ice on top. Keep the cooler lid open and let any water drain out of the cooler. Keep out of the direct sun.
  • It's best to buy the crawfish the day you plan to cook them.
  • When cleaning the crawfish keep a constant flow of water running. Do not leave the crawfish sitting in water in the hot sun for a long time as this will cause them to die. Rinse crawfish and drain water. Repeat until water remains clear.
  • Purging the crawfish in salt water will start to kill them. Purging in salt is not recommended. Handle the crawfish with care. Do not drop or throw the crawfish bags as this can crush them.

How much meat can I expect?


Some, but not all crawfish are sized or graded, but small to medium ones give the highest meat yield and are easier to peel. Based on a yield of 15 percent meat, 6‑7 pounds of live crawfish will provide 1 pound of peeled tails. You should plan on purchasing 3‑4 pounds of live crawfish per person per meal or 1 pound of fresh or frozen tails to feed three people.

How to Eat Crawfish

Wash hands.
Peel them while they are still warm.
Separate the tail from the head by slightly pulling and twisting, and discard the head.
Hold the tail between thumb and forefingers and squeeze until you hear the shell crack.
Grasp the first three segments of tail from the side and pull off by lifting up and pulling around the meat.
Firmly grasp the exposed meat in one hand, the tail fin in the other, and pull gently.
The meat is now ready to eat, freeze, or serve with your favorite cocktail sauce.

Tuesday, May 10, 2016

Expensive Grocery Store Items


Dairy and pantry items often dismay me with their high prices. That doesn’t mean I don’t buy them (I’m looking at you, pine nuts!), but it does mean I think twice about what I really want and need, and what, if any, economical hacks I can implement or substitutes I can use.

Here are items that I don’t just toss into my cart:

Vanilla BeansIn my baking life, I’ve bought vanilla beans exactly once and it was so long ago, I cannot recall why. Though feather-light, at $116.80, they’re hardly cheap. They’re a labor-intensive spice that grow from orchids; they need hand pollination, for crying out loud; and the biggest producers are now in faraway Madagascar and Indonesia.

 Vanilla extract, which costs $4.12 for a two-ounce jar. (There’s also imitation vanilla extract, which costs about $1.60 for an eight-ounce jar if even extract is too much.) 

WalnutsLike most nuts, they’re not cheap; at the Fairway near my office, they go for $13.99 a pound if I buy the supermarket’s pre-packed option. If I go for the halves and pieces together they’re a bit cheaper at $11.99 a pound.

Artichoke Hearts
I heart artichoke hearts but am generally too lazy to steam fresh artichokes (it takes 45 minutes at least!). Artichoke hearts that someone else has prepared will do me just fine. In olive oil at the deli counter they run about $7.48 per pound.

Native Forest whole artichoke hearts (in water they weigh almost 10 ounces; the dry weight is about 5 1/2 ounces), cost $2.57 and are good enough for me to eat as a snack straight out of the jar, or to add to a salad where my own dressing dresses them up just fine. 

Cultured Butter
Butter is cultured when the cream used to make it is fermented before it’s churned. Fans say it’s got a nuttier, tangier taste than regular butter and, because added cultures increase fat content, it makes baked goods even better. Maybe the extra step taken to add cultures to the cream is what causes its higher price—not to mention the cost of high-quality cream in the first place. Cultured butter costs $3.49 for 4 ounces; where I shop, $3.61 will buy four 8-ounce sticks of regular butter.

Dried Cherries
What accounts for the high price of dried cherries? At my supermarket, two different kinds—dried Bing organic cherries from Uzbekistan and red tart cherries (also from Uzbekistan)—cost $24.20 per pound and $20.56 per pound respectively. Is it because they’re pitted, as one farm’s social media post suggested? Is it because they come from far away? Is it because their growing season is short and they’re a small fruit that get even smaller once dried?

Monday, May 9, 2016

Date stamps on groceries what they really mean

I used to be one of those people who panicked when I saw that the date stamped on my yogurt, milk, or eggs had passed. I was blind to whether it said "sell by" or "use by": if the date had passed it went straight to the trash, no questions asked. It turns out I probably wasted a whole lot of money and ingredients by doing that.


Most of these dates are concerned with the peak freshness of a product, not the date a product is spoiled or inedible. According to the USDA, this is what those labels really mean:

Sell By
This label is an indicator for retailers: stores should sell the product by this date in order to ensure it will be fresh for customers. Think of it as the last date the item will be at its highest level of freshness; in other words, the item will still be edible after that date.

Best if Used By
If you see this label, it's really just another indicator of freshness. The quality may have gone down after the stamped date, but the product is by no means inedible after the date. Don't toss it in the trash just yet.

Use By
This is the last date recommended to eat the product and is determined by the manufacturer. Again, the item may not be spoiled on or after this date, but this is the last day the manufacturer guarantees that it is at peak quality. 

Sunday, May 8, 2016

Keep your fridge stocked without breaking the bank

Food waste is one of the No. 1 drains on your bank account (and the ecosystem). How much could you save?

According to Tristram Stuart, founder of Feedback, an environmental organization working to end food waste, a third of the world's entire food supply could be saved by reducing waste in developed countries (the biggest offenders), which is enough to feed 3 billion people.

To put that into personal perspective, if you spend $7,852 a year on groceries (the national average for food spending according to a 2012 Gallup poll), and you throw away a third of it, you've thrown away over $2,500 over the course of a year. You could buy two kids a really nice laptop for school with that kind of cash.

But if you know how to shop and store smarter, you can save money (and maybe even feed the world) without sacrificing.

1. Monitor what you throw away

Most people don't realize just how much they throw away. Keep a pad of paper somewhere in the kitchen, and write down everything you have to throw out, whether it was leftovers from a meal (and how many servings you threw out) or just stuff that spoiled before you ate it. You might need to adjust how much food you prepare or how much you buy.

2. Shop smart

And remember to buy only what you need — realistically. If something you're cooking calls for only two potatoes, don't buy a whole bag. If you know you eat out twice a week, don't plan seven days' worth of meals.

3. Learn about storage

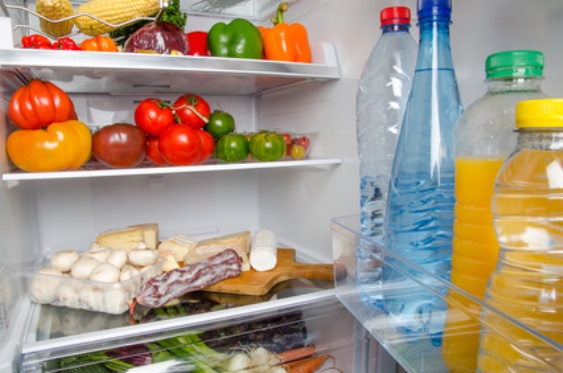
If you're regularly throwing away food, you may not be storing it right. Learn how to store fruits and vegetables properly to keep them from spoiling and how to organize your refrigerator to keep foods fresher longer. The way your mom used to do it might not be the best way.

4. Learn about freezing

Many food items can be frozen with little to no adverse affects. Learn what can be frozen and the proper way to freeze it to avoid freezer burn. Just make sure you date them and plan meals over the next couple of months that will let you use them up. This is an effective way to preserve foods you suddenly realize you won't be using because of that last-minute party invite or to take advantage of sales on items in too large a quantity to use up in time.

5. Learn about preserving

Many foods can be turned into pickled goodies, jams or jellies and more with a small investment in canning supplies and a little know-how. Other foods can be dried or dehydrated.

6. Invest in a vacuum sealer

Vacuum sealers remove all the air prior to storage and can make your food last as much as five times longer.

Saturday, March 5, 2016

Difference Between East Coast Butter and West Coast Butter


I've only ever known American-made butter to come in long, narrow sticks. Turns out I was living in a butter bubble;

the difference between West Coast and East Coast butter that I realized there was a difference to be known at all.

Elgins vs. Western Stubbies

There are quite a few factors that have contributed to what turns out to be a very rich history of the size and packaging of butter in America, from the birth of the butter industry to the availability of milk. But the primary factor that both literally and figuratively shaped the size of butter is the machinery used to manufacture it.

The butter industry has historically been stronger on the East Coast, thanks to an abundance of milk. After the necessary amounts went to produce whole, reduced-fat, and fat-free milk, the excess was made into dairy byproducts. Butter was produced and shaped into what's known as the Elgin-style sticks, named for the company that manufactured the machinery used to process and pack the butter. Once the West Coast finally caught up with dairy production, the Elgin-style machines were no longer available. The replacement machines packaged butter into short, fat sticks that are now known as Western stubbies.

Today, companies like Land O' Lakes continue to produce butter of both sizes to satisfy the stick preferences of the respective coasts. Not much has been reported on what size stick is more prevalent in the Midwest.

What does your butter look like? Do you buy Western stubbies? East Coast Elgins? Fat blocks of European-Style butter? As far as I'm concerned, all three make a damn fine slice of toast.

Keep an Avocado from Browning


mmm…avocado. Nothing beats the creamy goodness, but sometimes (we said sometimes), you only feel like eating a half. Here, a few methods to help you store for later.

STORE IT WITH AN ONION

Place the avocado in an airtight container with about a quarter cup of freshly chopped red onion. The sulfur compounds in the onion (you know, the ones that make you cry) will oxidize on the green surface and prevent it from browning…for a couple of days at least.

BRUSH IT WITH OLIVE OIL

Right before you seal the un-eaten avocado half in an airtight container, use a pastry brush (or paper towel, in a pinch) to slather the green surface with olive oil. Then pop it in the fridge.

COVER IT WITH LEMON JUICE (AND PLASTIC WRAP)

Same deal as olive oil. Brush the juice onto the exposed green. Then, instead of using an airtight container, wrap the avocado half in Saran wrap. Just be sure you press the plastic against the surface to help seal in the lemon juice.

Friday, March 4, 2016

Difference Between European and American Butter?


Have you noticed the butter options in your dairy aisle expanding? A few short years ago you'd be hard-pressed to find anything but unsalted and salted butter. Perhaps it's a result of our changing relationship with fat (we're back to liking it, it seems), or maybe the demand for more flavor found its way to the ears of the dairy industry — either way, the contents of the butter section have expanded.
There are more options than ever, and most of those new arrivals seem to come with a continental accent. European butter is dominating the shelves. But what is it exactly, and how is it different from good ol' unsalted or sweet cream butter?

European aka European-Style Butter

Butter can have a nationality. French butter, American butter, Moroccan butter — each one of these is going to be slightly different because of the the method used to produce it. So when we talk about European butter, we're really talking about a style in which butter is produced throughout Europe. European-style butter refers to a cultured butter that has been churned longer to achieve at least 82 percent butterfat. Traditionally the butter is allowed to ferment to achieve a light sour taste, but you're more likely to find butter made with added cultures. Either way, you still end up with a tangy butter.
Overall, European-style butters are favored for their rich taste — a direct result of the higher butterfat content. More butterfat also means a softer texture, faster melt, and often, a saturated yellow hue. With less water, European-style butters are often the preferred butter for baking — especially when the flavor of butter is just as important as its function.

All-American Butter

The percentage of butterfat in butter is regulated by whomever is keeping tabs on those things. For the U.S., it's the feds — specifically the USDA. In order for a churned dairy product to be considered butter, it must contain at least 80 percent butterfat. And that's what you get when you purchase unsalted butter or sweet cream butter, which is simply salted butter. These butters are not cultured, so expect a more neutral flavor.
Making a call on when to use what butter depends on your scenario. Making flaky pie dough? Go European-style if you can; the higher fat content will mean more flakiness. In recipes where butter isn't the lead (think: brownies, quick bread, greasing baking pans, etc.) unsalted or sweet cream butter still delivers, with economy and function.

Wednesday, December 9, 2015

Foods You Should Never Refrigerate

Foods You Should Never Refrigerate

According to the US Department of Agriculture, there are two types of bacteria that cause problems. Pathogenic bacteria leads to food-borne illnesses, and spoilage bacteria changes the way foods look, smell, and taste. When food develops dangerous levels of pathogenic bacteria, it could look, smell, and taste normal while still being dangerous. But when spoilage occurs, something can taste gross but won’t necessarily make you sick. Confusing, right? Here’s a list of 31 items that will do just fine outside the fridge:

1. Potatoes: When too cold, starches found in potatoes turn to sugar, yielding an off flavor. Keep potatoes stored in a paper bag in a cool, dark cupboard or drawer. Same goes for sweet potatoes.
2. Honey: Your luscious honey will turn to crystallized gunk if it is stored in the fridge. Store it at room temperature and out of direct sunlight for happy honey.
3. Tomatoes: Tomatoes actually start losing their flavor and become quite mushy if left in the fridge. Leave on the counter and use when they have a slight give to the outside skin.
4. Apples: Apples, just like tomatoes, start to loose flavor and texture after spending time in the fridge. Leave them on the counter, and toss them in the fridge for 30 minutes prior to eating if you want a crisp bite.
5. Onions: The best place for onions is in a paper bag in a cool, dark cabinet or drawer. If stored in the fridge, they soften and impart an oniony scent on nearby foods.
6. Peanut butter: Peanut butter does just fine stored in a cool, dark cupboard.
7. Bread: You might be tempted to store bread in the fridge, but it actually dries out faster. Instead, store it in a cool cupboard or bread box for a fresh slice.
8. Bananas: Leave those bananas on the counter, and if they turn brown before you get to them, toss them in the freezer to make banana bread at a later date.
9. Most oils: Pretty much all oils are safe to store at room temperature. If the oil has a lower saturated-fat content, such as safflower or sunflower, it will benefit from being kept cool, so store it in a dark cabinet or the fridge door.
10. Avocados: Store avocados on the counter and any leftovers in the fridge. But they’ll lose flavor, so it’s a good idea to use a whole one when making the cut.
11. Peppers: Red, green, yellow, and even chili peppers are just fine stored in a paper bag in a cool cupboard or drawer.
12. Winter squash: Acorn, spaghetti, and butternut do best when stored at room temperature.
13. Citrus: Store oranges, lemons, and limes at room temperature on your kitchen counter. Just be careful not to bunch them too closely, or they will tend to mold.
14. Berries: Fresh berries already have a short shelf life, so leave them out of the fridge and eat them within a day or two of purchasing.
15. Melons: Most melons do best outside the fridge. Once refrigerated, they tend to break down and become mealy. After cutting, if any are remaining, store them in the fridge.
16. Ketchup: Yup, your ketchup is just fine in your pantry — even after it has been opened. Because of the amount of vinegar and preservatives, it will do just fine (think ketchup packets at your favorite fast-food restaurant).
17. Jam: Due to the high amount of preservatives in jams and jellies, they are also OK to store in the pantry after opening.
18. Stone fruits: Stone fruits aren’t friends of the fridge, so leave them on the counter until they’re ripe, and then eat.
19. Pickles: Another item high in preservatives, mainly vinegar, pickles will stay crisp in the pantry. But, if you’re a fan of cold ones, store them in the refrigerator door, which leaves the coldest spots of the fridge for items that really need the space.
20. Garlic: Store garlic in a paper bag in a cool, dark spot, and it holds its wonderful flavor for weeks.
21. Hot sauce: Make more room in your fridge, and store hot sauce in your pantry — even after it has been opened. All the preservatives and spices keep it safe for topping your eats.
22. Spices: Ground spices do not need to be refrigerated. Ever.
23. Coffee: Many think coffee deserves a special place in the fridge or freezer, but it actually is best at room temperature so its natural oils can really flavor your favorite cup of joe. Buy in small batches for really fragrant, and rich, morning coffee.
24. Soy sauce: Yes, there is more than enough natural preservatives (salt) in soy sauce for it to remain safe if stored at room temperature.
25. Some salad dressings: Just like other condiments, most salad dressing, especially ones that are vinegar- or oil-based, are just fine stored outside the fridge. Cream-, yogurt-, or mayo-based dressings should be stored in the fridge.
26. Nuts: Nuts are just fine stored in a cool, dark spot.
27. Dried fruits: No need to refrigerate. Nope.
28. Cereal: Cereal is wonderfully happy in the pantry.
29. Vacuum-packed tuna: You might not be sure, but that tuna has been sealed, just like in a can, so it’s more than fine stored at room temperature.
30. Herbs: If you pick up fresh herbs from the grocery store, instead of stuffing them back in the suffocating plastic bag, place them in a water-filled glass jar on your kitchen counter, creating an herb bouquet to use while cooking.
31. Real maple syrup: As with honey, that maple syrup will crystallize and get goopy if stored in the fridge.


Tuesday, December 8, 2015

Canola Oil is Better Than Olive Oil

It sits, cowering, on a back shelf, usually in a stout, hulking oil tanker of a container. Its bottle is plain, never prettily adorned with the flowering vines that olive oil gets. And unlike butter, it is never used to finish a steak, melting alluringly as the beef sizzles away. No, canola oil is the Peggy to olive oil’s Joan. The Louis C.K. to Paul Rudd’s butter.

In short, it gets no respect.

It’s a Cheap Way to Fry

When I'm frying, whether it's Andy Ricker's wings or Molly Wizenberg's wonderful French toast from her book A Homemade Life, I'm using canola.

Even Bobby Flay admits that “ninety-eight percent of the time, I cook with canola oil.” He loves that it has a higher smoke point (the temperature when the oil starts smoking and becomes more likely to give your food a scorched flavor) than, say, olive oil.

It’s Neutral

Sometimes you want an oil that doesn’t add a thing: Butter is buttery. Extra-virgin olive oil is fruity, green, or olive-y. Canola’s generally neutral taste is part of its charm.

It’s Relatively Good for You

Canola clocks in lowest for saturated fat out of 16 oils, at only 6 percent—as opposed to olive oil’s 14 percent, grapeseed’s 13 percent, and coconut oil’s daunting 89 percent—which is why you’ll sometimes see it flaunting a cute little heart icon at the grocery store.

It’s Not That Pricey

Because it doesn’t have the foxy reputation of olive oil or butter, canola is still relatively easy to snag on the cheap, which is great if you’re going to fry something in two full inches of oil.

It’s Not Always Packed With GMOs

As this blog post notes, canola oil “comes from a specifically bred variety of rapeseed, which is part of the mustard family along with kale, cabbage, and Brussels sprouts.” (In fact, it was called “rapeseed oil” until some wise Canadians changed its name.) So although some articles declaim canola oil as being packed with genetically modified organisms, organic canola shouldn’t have them, and one can buy verified non-GMO canola oil.

Wednesday, November 25, 2015

How long can you eat those leftovers?

How long can you eat those leftovers?

Deep in the recesses of most people's refrigerators lives a half-eaten bottle of salsa, some takeout Chinese food and last week's chicken dinner. Pulling one of those things out, you wonder: Can I eat it? Is it safe? A lot of commercially prepared items, such as sauces and condiments, have best-buy dates on the packaging to ensure flavor, not safety, according to the U.S. Department of Agriculture.

 Packaged foods tend to last a big longer than those suggested dates. Last night's dinner, though, is not as hearty. Cooked food leftovers can usually stay in the fridge for only three or four days. And if you want to put food in the freezer, it will last indefinitely, but at some point it will start to lose flavor. Of course, if something smells off or looks funny, you shouldn't eat it.
Here's the eat-it-or-chuck-it guide to your slightly suspect leftovers, based on advice from the Agriculture Department and the food safety site stilltasty.com.


Monday, November 16, 2015

Brining Tips for the Turkey Bird...


It's a classic Thanksgiving scene: A beautiful showpiece of a turkey graces the center of a Dwell-worthy tablescape, with its blistered golden skin glowing brightly like a first-place trophy. The sharpest of knives is drawn, the bird's aroma amping up the anticipation of that first bite. And, finally, when that bite happens . . . wait, what the #%!&? It's stringy, flavorless, dry, and not even gravy can save it.

Brine Basics
At the most basic level, brining refers to presalting protein before it gets cooked. Think pork shoulder, chicken legs and even fish. Salt loves water, and when it's sprinkled onto the skin of these proteins, it draws out the water and then fills that empty space with salty brine. While the salt is creeping inward, it is simultaneously breaking down the meat, tenderizing and allowing it to retain moisture. When the poultry is cooked, proteins coagulate and prevent the absorbed liquid from escaping, ensuring juicy and flavorful meat. This is never more necessary than with a Thanksgiving bird.

Team Wet Brine vs. Team Dry Brine
There are two schools of brining, wet (where meat is submerged in a salty liquid) and dry (where meat is given a nice salt rub). Both produce a great bird, but chefs will go to the mat for their team.

For a wet brine, dissolve salt in water, often with sugar, to create a well-seasoned liquid. Food science author Harold McGee suggests using a 5 percent salt solution (by weight) for an optimal job of tenderizing. That translates to roughly a scant three tablespoons of salt per one quart of water. Of course, this number slides up and down depending on how long the turkey sits in the brine. (Be warned: If a turkey sits in the brine for too long, it will turn into a salty and almost-mushy piece of meat.)

On the other end of the spectrum, dry brining also helps achieve juicy, flavorful meat and has the added bonus of not requiring a giant bucket to let your turkey brine away in. Chef Matt Lambert of The Musket Room in New York strongly supports dry brining his turkey, saying this method offers a more controlled flavor and ensures a better sear. He breaks the turkey down, then places the legs and breasts on a large tray lined with parchment paper and seasons the meat "reasonably heavy and lets it stand until the salt is completely dissolved, about one hour."

Flavor: What Aromatics Do Chefs Recommend?
Brining isn't just about keeping turkey moist; it's also a time to infuse the meat with flavor. George Mendes of Lupulo submerges his turkey in a brine made with warm spices, like cinnamon and star anise, before basting with a Spanish paprika marinade and roasting it.

More Turkey Brine Tips
Dry out wet-brined turkeys. After the turkey has soaked in the brine, rinse and let it dry. Thorough drying of the turkey ensures crispy, golden skin when the bird's roasted.

Be aware of cooking times. Brines are a curing method, and curing is a form of cooking. Brined turkeys cook faster than those that have not been brined.


Turkey Tips for the perfect bird


Roasting a turkey is easy. Roasting a juicy turkey with perfectly blistered golden brown skin? Not so easy. But it can be. Follow these five tips, and you'll be responsible for a flawless Thanksgiving turkey your guests will always remember.


Brine and Dry
You must brine your bird using either a wet or dry brine. Both produce a seasoned, juicy turkey, but in different ways.
  • A wet brine is a salt solution in which you submerge your turkey for four to 48 hours. As the turkey soaks, the salt draws out moisture and replaces that lost moisture with seasoned brine, adding flavor and tenderizing the meat.
  •  A dry brine refers to a salt cure that you slather onto the bird and then let sit overnight in the fridge and/or at room temperature for one hour before going into a hot oven. The salt works like the wet brine, but because there is no additional liquid, the bird's own juices yield a more pronounced meaty flavor and a crispier skin.
The Perfect Rack
DIY your rack instead of buying one, like George Mendes of Lupulo does for his Portuguese Roast Turkey. Layer the bottom of your roasting pan with carrots, onion, celery and bay leaf. As the vegetables cook, they release steam, helping keep the turkey juicy and preventing the bird from being overcooked. 

Tricks to Avoid Overcooking
Never put a frozen turkey, or even a refrigerated one, directly into a preheated oven. Let the turkey sit at room temperature for at least one hour to raise its internal temperature. This will ensure even cooking from skin to bone.
Always use a meat thermometer to take the temperature of the thickest part of the turkey, located around the thigh, avoiding the bone. The ideal final temperature for a juicy turkey is 165°. The meat will cook an additional 10° as it rests, so remove the turkey from the oven when the temperature reaches 155° to 160°.
Now, this is important: Breasts cook faster than the legs. Different tactics can be used to avoid overcooking the breasts. Food science writer Harold McGee puts ice packs onto the turkey breasts while letting the bird sit at room temperature before roasting. Mendes removes his turkey from the oven when the breasts reach 155°, lets it rest for 20 minutes and then carves off the breasts. Then he returns the turkey to the oven and continues to roast it until the legs reach a slightly higher temperature, around 160°.

Start Hot, Then Double Drop
Always start with a hot oven. To achieve perfectly blistered, golden brown skin, preheat the oven to 475°. After the turkey goes in, immediately reduce the oven temperature to 425° and cook for 20 minutes. Drop to 350° and continue to roast until done. Oh, and you'll need to invest in an oven thermometer to know the exact temperature of your bird as it cooks.

Give It a Rest
Resting a turkey is not optional. It's as necessary as any step in this process. Let the turkey rest for at least 20 minutes and up to one and a half hours after taking it out of the oven and before carving. This ensures maximum flavor and juiciness. Covering with foil isn't necessary and risks steaming the skin and overcooking the turkey, which, of course, is very bad.

Wednesday, November 4, 2015

Shrimp Etouffee base by Zatarain's

I normally don't make Shrimp Etouffee being its almost as time consuming as making gumbo. with that being said ... I was at Foodtown doing my grocery shopping and run across Zatarain's Etouffee Base which was on sale for 1.50$ a box. So i justified it by saying if it taste like crap you only spent a 1.50 an maybe 5$ for frozen popcorn shrimp. Into the basket it went.

Well much to my surprise it was very simple to make, you use 2.5 cups of water, 2 tablespoons butter and 2 table spoons tomato paste and mix in the base. instruction said to cook on simmer for 15 mins then add shrimp and cook another 15 mins, then serve over rice. On my stove simmer is more like trying to heat a pot of water w/ a box of matches, slow and unproductive. so i kicked up the heat "BAM" and 15 mins later added shrimp then another 15 for the shrimp to cook.

So into a bowl it went w/ rice and a dash of hot sauce

i have to say i was very very impressed, it was flavorful and had just the right amount of heat before i kicked it up a know w/ the hot sauce.

Score 1 for Zatarains


So next time you happen to pass the Zatarain's section in your grocery store pickup a box. i have seen it as low as 1.50$ a box to 3$ a box. Regardless of the cost its a keeper in my book.

Saturday, September 19, 2015

If Meat Changes Color, Has It Gone Bad?

What Causes Meat and Poultry to Change Color?

From red meat to poultry, here's why meat can change color and what it means.

Red Meat

Appearance no doubt plays a big part in what we think of as fresh, and in the case of red meat, you probably equate a bright-red color with freshness. This color is a result of the protein in meat called myoglobin, which turns into oxymyoglobin and produces a vivid red color when it comes into contact with oxygen.
Not all red meats are the same color, though — color is influenced by factors like diet, sex, exercise, species, and especially age, which can produce darker-colored meat.
Prolonged exposure to air and light will also darken meat that starts out bright red, as you've probably seen when pre-formed hamburger patties start to turn gray, but are still red or pink inside. Color changes can also occur if raw meat is frozen, where it can fade or darken in color.

Poultry

Raw poultry can sometimes have a bluish tone to the meat or bright-yellow skin, which might seem strange if you're used to pink iridescent meat and whiter skin. As with red meat, the color variations result from differences in diet, breed, exercise, and age. Poultry can also change in color when frozen.

So Is It Safe to Eat?

The good news is, even if there's a color change — which might not be as visually appetizing — the meat or poultry is still perfectly fine to eat if stored properly in the refrigerator or freezer and consumed within a safe period of time (up to two days for ground meat and five days for other cuts).
What you really want to watch out for even more so than color change, is meat or poultry that has a bad odor or is sticky, tacky, or slimy to the touch. Let your other senses be your guide in these instances.


5 Fast Fixes for Cooking Fails


  • I still cry whenever I slice onions


Chilling the onion for an hour in the refrigerator before chopping. The cold temperature slows the formation of the sulfur compounds that are released when the onion is cut. If you chop quickly enough while the onion is cold, you may not tear up at all


  • How can I save an oversalted dish


Serve it over an unsalted starch or grain, such as rice, potato puree, polenta, or quinoa. Accompany the food with a sweet, fizzy wine, like Prosecco or Champagne, or even sparkling water. Bubbles cleanse the palate of salt, which means every sip refreshes your taste buds.

  • I'm making guacamole, but the avocados are hard as rocks
Place avocados in a brown paper bag with a banana, then leave the bag on a sunny windowsill for 18 to 24 hours. Together, the banana and the avocados release a large amount of ethylene gas, which can hasten ripening. If you can't wait a day, try this trick from California avocado grower Carol Steed: Place 2 peeled, pitted avocados in a blender with 1 cup peas (fresh, or frozen and thawed); pulse until smooth. The peas will help soften the consistency of the unripe avocados but won't affect the flavor.

  • I accidentally made dinner too spicy
There are a few ways to tone down overly fiery food. Sara Moulton, a chef and the host of Sara's Weeknight Meals on PBS, says sugar is an unobtrusive antidote—especially for soups, chilies, and stews. Add it in ½-teaspoon increments, and taste after each round. You can also dilute spiciness by adding more of the main ingredient.If you're cooking meat, add some more meat." Another option: Plate the dish with a garnish of soothing dairy—like a dollop of cool ranch dressing alongside way-too-hot wings.
  • My pots have baked-on stains
To remove interior spots, put an inch of water and 2 drops of dish soap in each pot and bring to a boil. Let the liquid simmer on low heat for 5 minutes, then pour it out and scrape off loosened bits with a plastic spatula.

Wednesday, August 5, 2015

Is It Safe?

"Best by" and "sell by" dates are just a suggestion and a best guess. Don't throw away perfectly good foods because the label says so. The link below is a useful guide which can tell you what foods last forever and which ones you should err on the side of caution with. 


Still Tastie

Wednesday, April 15, 2015

How to Defrost Any Meat


How to Defrost Any Meat


The freezer is one of our favorite assets in the kitchen. We've constantly got ours stocked with frozen sausages, fish, ground beef, and other proteins that make quick weeknight meals in a pinch, all without having to run to the grocery store.
There's just one thing: Integrate a freezer pantry into your home cooking and you'll need to become a defrosting pro. Yes, cooking directly from frozen is technically an option, but doing can result in watery protein and an overall loss of quality.
Essentially, you've got three choices when it comes to safely thawing protein. Which one you choose comes down to how much time you have.

IDEAL: The Refrigerator

Say you've got all the time in the world and really planned ahead for tomorrow night's dinner. If that's the case, the absolute best and safest way to defrost your frozen meat is in the refrigerator—your meat will defrost at a consistent temperature that's below the USDA's magical safety mark of 40 °F.
Simply place your meat—either in its plastic packaging, or removed and covered with plastic wrap—on a plate in your fridge the night before you plan on cooking it. The plate ensures that any moisture produced during the thawing process doesn't end up all over your fridge. Check back the next night and you'll find perfectly thawed pieces of chicken, fish, or steak ready to get seasoned and cooked. If you're working with a larger piece of meat like a whole chicken or a roast-size cut of beef you'll want to allow more time to ensure the meat thaws all the way through.
Really want to get ahead? Ground meat, stew meat, poultry, and seafood will be safe in the fridge for an additional day or two after defrosting; beef, pork or lamb roasts, chops and steaks can keep for 3 to 5 days.

IN A PINCH: Cold Water

More often than not, this is the situation: We get home from work and need to get dinner on the table in less than an hour. In these cases, place your protein in a resealable bag and submerge it in a large bowl of cold tap water. Just as with the refrigerator method, thawing times depend on the size of the protein. Small items like sausage, boneless chicken breasts, and thin cuts of steak such as skirt will defrost within an hour. Thawing larger cuts will take 2 to 3 hours, and you'll need to change out the water every hour to ensure things stay cold.
If you have a change of plans and decide you don't want that chicken breast you've been defrosting in cold water for dinner, make sure you cook it through before putting it back in the fridge or refreezing.