Total Pageviews

Monday, December 29, 2014

How to get rid of cooking smells in your home


Bacon fat. Broiled fish. Spicy curry. These are just a few of the food odors that smell so good when dinner is on the table — and so awful the next morning when the smell invariably lingers. What can you do to minimize pungent cooking odors, especially in small apartments? Here are five simple, inexpensive ideas.

1. Close bedroom and closet doors while cooking.

Fabric readily absorbs grease and odors, and can't be cleaned with a quick wipe-down the way hard surfaces can. Closing bedroom and closet doors before cooking anything smelly or greasy ensures that you won't have to fall asleep in a bed that smells like bacon. (Although it might help you wake up in the morning.)

2. Ventilate however you can.

The best way to avoid odors is to get them outside or otherwise out of the air as quickly as possible. If you have a vent over your stove, use it! Otherwise, an air conditioner or air filter can remove greasy cooking smells from the air. (Remember to change filters regularly.) Even just opening a window helps, especially if you can set up a fan pointing out the window, to push odors outside.

3. Clean up immediately.

Wipe up splatters on the stove and counter top, and wash all greasy cooking pans as soon as possible. There's nothing worse than waking up to a pan full of stinky oil sitting on the stove.

4. Simmer your favorite spices.

Pleasant-smelling whole spices like cinnamon sticks, cloves and citrus peels can be simmered in some water on the stove for an all-natural air freshener that masks any lingering cooking odors.

5. Leave a bowl of vinegar, baking soda or coffee grounds on the counter overnight.

To absorb stubborn odors, leave a small bowl on the counter filled with white vinegar, baking soda or coffee grounds before you go to bed. Any of the three will naturally dissipate any remaining cooking smells by morning.
Do you have any other tips for minimizing or getting rid of pungent cooking smells?

Bacon-Wrapped Jalapeño Poppers


Bacon-Wrapped Jalapeño Poppers

Bacon-Wrapped Jalapeño Poppers

I serve these at all my gatherings an they are always the first to go.

Ingredients

12 wooden toothpicks
4 oz (half of 8-oz package) cream cheese, softened
2 tablespoons chopped fresh chives or finely chopped green onions
6 jalapeño chiles (2 to 3 inch), halved lengthwise, seeded
4 slices bacon

Directions

  • 1 Heat oven to 375°F. Line cookie sheet with foil or cooking parchment paper. Soak toothpicks in small bowl of warm water to prevent burning.
  • 2 In small bowl, mix cream cheese and chives. Spoon mixture evenly into chile halves.
  • 3 Cut each bacon slice crosswise into thirds. Wrap 1 piece of bacon around each stuffed chile half; secure with soaked toothpick. Place on cookie sheet.
  • 4 Bake 25 minutes or until bacon is crispy and chiles are tender. Serve warm.

Heat Fully Cooked Ham


Ham is traditional for Easter dinner and for Christmas in the United States. But, as with all big chunks of meat, many people are intimidated by it. After all, a large ham can cost more than $70.00; that alone is enough to scare anyone who wants to serve it hot and juicy. So what's the best way to heat fully cooked ham?

Please check the BBQ site for information about country hams.

True hams are made from the leg of the pig; the butt end or shank end is cured, by wet curing in a brine solution, or dry curing, then smoked or cooked. The butt end has more meat and fat, and the shank end has sweeter meat. Hams are sold boneless or bone-in. Some people think that the bone-in hams have more flavor; the choice is up to you. Remember, these instructions are for reheating a fully-cooked ham. An uncooked ham is a fresh ham and must be cooked to 160 degrees F before eating.

  • Spiral Sliced Hams
    These hams are delicious cold, but if you want to reheat them, the instructions are on the package. Place the ham, cut-side-down, on heavy-duty aluminum foil and wrap the ham thoroughly. Or use an oven roasting bag; follow instructions on the bag for preparation. Bake in a preheated 325°F oven for 10-14 minutes per pound, or until a meat thermometer registers 140°F. Remove from oven and let sit for 10 minutes before serving. If the ham came with extra glaze, follow the package directions for adding it and cooking the glaze. To glaze this type of ham, turn the oven to 400°F, brush the ham with the glaze, and bake for 10-15 minutes until the glaze is browned and bubbling. Let stand for 10 minutes before slicing to serve. My current favorite ham is New Braunfels Hickory Smoked Spiral Sliced Ham. It has the perfect texture and a wonderful sweet flavor.
  • Slow Cooker Method for Heating Ham
    Hams emerge very moist and tender from the slow cooker. Make sure that the ham will fit into your slow cooker. Place the ham in the appliance and add the glaze ingredients. You can also just add some Coke or Pepsi, chicken broth, or water; about 1 cup will do it. Cover and cook on low for 5-8 hours, until ham is thoroughly heated. If you want to glaze the ham, place on a broiler pan and cover with glaze; broil 10" from the heat for 10-15 minutes, watching carefully, until glaze is cooked.
  • Oven Method
    The goal is to reheat the ham without drying it out. The best way to do this is to place the ham on a rack in a roasting pan. Add water to the bottom of the pan and cover the whole thing tightly with foil. Bake at 325°F for 18-20 minutes per pound, until a meat thermometer registers 140°F. Unwrap the ham and apply the glaze; increase the heat to 400°F and bake for 15-20 minutes longer until the glaze is burnished. 
  • Grill Method to Heat Ham
    It's difficult to grill a whole or half ham because the method uses such dry high heat. Ham steaks or slices, however, can be wonderful grilled. If you do want to grill a large ham, use the indirect cooking method and make sure that the coals burn down to a gray ash coating before you add the ham.
  • You do have to carefully read the label of the ham you purchase to make sure you prepare it properly. Most hams sold in the supermarket are fully-cooked, but check the label to be sure. In this case, you are just reheating the ham, and the most important consideration is to make sure it doesn't dry out.

Ham Glaze Recipes

Glazing a ham can definitely turn it from simple to special for the holiday!

For starters, a glaze is any combination of ingredients that is brushed or slathered on the meat to enhance its flavor. If you Google ham glazes you will get 256,000+ results, so here is the short list. My rule for a good glaze is no more then 5 ingredients. I like to keep it simple and let the flavors in the glaze come through to enhance the ham not overpower it. I also prefer to glaze the ham during the entire cooking time (like basting a turkey) rather than glazing at high heat the last 20-30 minutes. Hope you enjoy!


If you have one of your own glaze recipes that rocks, please share it here. I would love to try it.

1. Honey and Brown Sugar Ham Glaze
  • 2/3 cup Brown Sugar
  • 3 tbsp Honey
  • 1 tbsp Prepared Mustard
2. Orange Glaze
  • 1 cup Orange Juice
  • 3/4 cup Brown Sugar
  • 1 tbsp Dijon Mustard
  • 1/2 cup Honey
  • 2 tsp Soy Sauce
3. Baked Ham Maple Glaze
  • 1 tbsp Mustard
  • 2/3 cup Real Maple Syrup
4. Brown Sugar Glaze
  • 1½ cups Brown Sugar
  • 1½ tsp Dry Mustard Powder
  • 3/4 tsp Ground Cloves
5. Marmalade Glaze
  • 1/4 cup Orange Marmalade
  • 1/2 tsp Dry Mustard
  • 1/2 cup Brown Sugar
  • 1 tbsp Flour
  • Pineapple Juice (enough to create a thick paste)
6. Pineapple Glaze
  • 1½ tsp Dry Mustard
  • 1½ cups Brown Sugar
  • 3/4 cup Crushed Pineapple, well drained
7. Chinese Glaze Recipe by Sophia Young
  • 1/2 cup hoisin sauce
  • 1/4 cup honey
  • 1/2 tsp Chinese five-spice powder
  • 1 finely chopped garlic clove
  • 1 tsp finely grated ginger
8. Ginger Glaze
  • 1 tsp Dry Ginger
  • 1 tsp Dry Mustard
  • 1 1/2 cups Brown Sugar
  • Canned Pear or Peach Syrup (to make thick paste)
  • 1 tsp Lemon Juice
Instructions (For All Recipes)
  1. First, you need to make a slit in the rind of the ham.
  2. Trim the rind and fat at the same time, leaving 1/4 inch layer of fat on ham.
  3. Make diagonal cuts along the surface of the ham, on the fat layer, making sure not to penetrate the meat.
  4. Now, make diagonal cuts in the opposite direction, forming diamond shapes in the fat layer.
  5. Take a bowl and put all the ingredients in it (this works for all the above mentioned recipes)
  6. Mix the ingredients well and brush over the ham.
  7. As the ham cooks, occasionally brush it with the extra glaze .

Friday, December 19, 2014

Partial Measurements

we have all run into the problem where we don't want to cook a full batch of cookies but a half batch. then we have to figure out what half of a 1/3 cup or half a teaspoon is. well the below chart makes is a lot easier.


Thursday, December 18, 2014

Perfect Beef Tenderloin Everytime


Impress your guests with delicious beef tenderloin; we’re showing you how to make it in two simple steps.


With its fabulous flavor and impressive look, beef tenderloin is a terrific choice for entertaining. Knowing how to cook it to perfection is easy when you follow our simple two-step guide.

What you’ll need:
  • Ingredients for Herb Roasted Beef Tenderloin
  • Kitchen string
  • Shallow roasting pan
  • Ovenproof meat thermometer
  • Aluminum foil
How to:

1. Heat oven to 425°F. Turn small end of beef under about 6 inches. Tie beef with kitchen string at about 1 ½-inch intervals. Place in shallow roasting pan and brush with oil. Sprinkle with pepper, marjoram and salt. Insert ovenproof meat thermometer so tip is in thickest part of beef. 

how-to-make-beef-tenderloin_01

2. For medium-rare, roast 35 to 40 minutes or until thermometer reads 135°F. (Temperature will continue to rise about 10°F and beef will be easier to carve.) Cover beef loosely with foil; let stand 15 to 20 minutes until thermometer reads 145°F. For medium, roast uncovered 45 to 50 minutes or until thermometer reads 150°F. Cover beef loosely with foil; let stand 10 to 15 minutes until thermometer reads 160°F. Remove string from beef before carving. 

how-to-make-beef-tenderloin_02

Snack Mix for Santa


Santa Snack Mix Recipe

This snack mix recipe featuring crunchy cereals, sweet raisins, and spices is sure to be a family favorite during the holidays. It also doubles as a healthy snack for Santa when he's delivering presents.

Ingredients

 4 cups toasted oat bran cereal
1 cup multigrain cluster cereal
1 cup chopped pecans $
Click to see savings
1 teaspoon ground allspice
1/4 teaspoon salt $
Click to see savings
3/4 cup honey $
Click to see savings
1/2 cup butter $
Click to see savings
1 cup jumbo red raisins $
Click to see savings
Wax paper

Preparation

1. Preheat oven to 250°. Combine first 5 ingredients in a large bowl.
2. Cook honey and butter together in a small saucepan over low heat, stirring occasionally, until butter is melted and mixture is blended and smooth (about 5 minutes).
3. Pour honey mixture over cereal mixture, stirring to coat. Spread in a single layer on a lightly greased aluminum foil-lined 15- x 10-inch jelly-roll pan.
4. Bake at 250° for 55 minutes, stirring once every 10 to 15 minutes. Stir in raisins, and bake 5 more minutes. Spread immediately on wax paper; cool 20 minutes. Store in an airtight container up to 1 week.
Note: For testing purposes only, we used Quaker Oat Bran for toasted oat bran cereal and Kashi GOLEAN Crunch for multigrain cluster cereal.

Saturday, December 13, 2014

Spice Chart

Here is a handy chart that explains which spices go best with different meats, fish and veggies.


Wednesday, November 26, 2014

Turkey Roasting Timetable Chart


Turkey Roasting Timetable Chart


The times in this chart are based on roasting in an open pan at 325°F with a chilled turkey (internal temperature of 40°F). The turkey is done when a meat thermometer reads between 180°F-185°F when inserted into a thigh; and 165°F when inserted into the center of the stuffing, if roasting the bird stuffed. Loosely cover the turkey once it has been removed from the oven. A whole roasted turkey will stay warm for up to an hour.

  Weight   Unstuffed (hours)   Stuffed (hours)
  8 to 12  3 to 4  3 1/2 to 4 1/2
  12 to 16  3 1/2 to 4 1/2  4 1/2 to 5 1/2
  16 to 20  4 to 5  5 1/2 to 6 1/2
  20 to 24  4 1/2 to 5 1/2  6 1/2 to 7
  24 to 28  5 to 6/12  7 to 8 1/2

Gravy Recipes and Tips

Gravy Recipes and Tips


Everybody loves gravy. There's no better way to capture the essence of a bird or roast than by making gravy using pan drippings and meat juices. But everybody has had awful gravy that's thick and pasty and flavorless. You can serve the best gravy every time by following these tips and using these recipes.

The only problem with traditional gravy recipes is that they are last-minute. This is the final kitchen task of the day, since you need the drippings from the turkey roasting pan and stock from simmering giblets for the best flavor. For best results, try to get others to help with finishing other dishes while you concentrate on that gravy.

There are three secrets to making perfect gravy.
  • Use a wire whisk to stir the gravy to avoid lumps.
  • Make sure to thoroughly cook the flour in the fat (before adding liquid) to avoid a starchy taste.
  • Salt is the key to the best flavor.
When you take the turkey out of the oven, remove it from the pan, take out the stuffing if used, cover it with foil and let it rest while the gravy is made.

You only need about 1/4-1/3 cup of fat to make lots of gravy. You're basically making a white sauce, except it will be brown because of the turkey drippings. Skim off any excess fat from the roasting pan, being careful to leave all the little brown bits that have so much flavor.

Now it's time to add the flour. Sprinkle the flour over the brown bits and fat left in the pan. Cook and stir until the mixture has bubbled for several minutes. Then start adding the liquid.

My grandmothers always put flour in a little jar with some water to make a slurry, shaking it vigorously to dissolve, then added that to the drippings. If you use this method, you will need to boil the gravy hard for 10-20 minutes to get rid of the flour taste. This also concentrates the flavor, as water evaporates from the stock.

You can also brown flour in the oven (watch it carefully!), then simply sprinkle that over the drippings and cook to make a roux before adding the stock and water.

For liquid, I like to use stock made from the turkey giblets (except the liver, which adds a bitter flavor), and the water used to cook the potatoes. Add to the drippings and flour in the pan and stir and stir and boil and boil.

Salt is the key to the best gravy. But you have to add and taste constantly. Start with about 1/2 tsp. for 4 cups of liquid. Then sprinkle in a tiny bit at a time, stirring and tasting. You'll know when you have the right amount, because the gravy will suddenly come alive with a marvelous meaty flavor.

If your gravy is lumpy no matter what you do, strain it through a large colander or strainer. Using a blender or food processor to try to remove small lumps from gray is nearly impossible.

Sunday, November 23, 2014

Thaw Frozen Turkey


Thaw Frozen Turkey


Although a whole turkey purchased frozen may safely be thawed in the refrigerator, in cold water, or in the microwave oven, thawing in the refrigerator is recommended. Procedures for all 3 methods of thawing follow.

To thaw turkey in the refrigerator:
Keep the turkey wrapped and place it in a pan; let stand about 24 hours for each 5 pounds of turkey. Let large turkeys stand a maximum of 5 days in the refrigerator. The giblets and neck are customarily packed in the neck and body cavities of frozen turkeys. They may be removed from the cavities near the end of the thawing period to expedite complete thawing of the bird. 

To thaw turkey in cold water:
Make certain that the turkey is in a leakproof package or a zipper-seal plastic bag. This prevents bacteria in the surrounding environment from being introduced into the food, and prevents the poultry tissues from absorbing water, resulting in a watery product. Change the cold water every 30 minutes. Approximately 30 minutes per pound of turkey are required for thawing. After thawing in cold water, the turkey should be cooked immediately.

To thaw in the microwave:
Before commencing to thaw food in the microwave oven, remove the food from its store wrap. Plastic trays, paper wrapping, and other packaging material not designed for microwaving may contain chemicals which could transfer to the food under the high heat of a microwave oven.

Consult the manufacturer's instructions for the size turkey that will fit into your oven, the minutes per pound and power level to use for thawing. Turkeys thawed in the microwave must be cooked immediately after thawing.

To refrigerate fresh turkey:
A whole turkey purchased fresh (not frozen) may safely be refrigerated up to 2 days before roasting.

Tuesday, November 18, 2014

Thanksgiving cheat sheet - Part 2


Thanksgiving day cheat sheet step by step for the big day

Thanksgiving morning:
  • Prepare the stuffing. Cover and refrigerate.
  • Wrap your roasting pan with foil or use a disposable roasting pan or cooking bag for a quick cleanup.
  • Clean the turkey, removing the bag of giblets. Place the turkey in the prepared roasting pan and put it back in the fridge.
  • Simmer the giblets, adding water as needed until tender. Then refrigerate, covered with liquid, until needed for the gravy.
  • Use your slow cooker if extra space is needed to keep menu items warm.
  • Children can help set the table and create place cards for each setting.
  • Prep any pre-dinner appetizers.
  • Clean as you go to avoid big cleanups later. 
Four hours before dinner:
  • Stuff the turkey.
  • Put the turkey in the oven. The roasting time will depend on size of the bird. 
Three hours before dinner:
  • Clean green beans, cover and set aside. 
  • Cook sweet potatoes.
Two hours before dinner:
  • Peel potatoes, then cube them and cover with salt water — simmer until tender. 
  • Finish preparing any additional vegetables.
One hour before dinner:
  • Fill a small pitcher with half-and-half or milk for coffee — cover and refrigerate. Fill sugar bowl.
  • Set out appetizers along with napkins and small plates, if using.
One half-hour before dinner:
  • Remove the turkey from the oven. Let it sit 20 minutes before carving.
  • Reheat bread, vegetables and other side dishes, if necessary.
  • Make gravy, using the drippings from turkey and the giblets.
  • Mash the potatoes.
  • Place vegetables, cranberry sauce and other side dishes in serving bowls.
Serve dinner!

  • Whisk the gravy and pour it into a gravy boat.
  • Open wine and pour into decanters or glasses.
  • Set out a pitcher of water so people can help themselves.
  • Make sure there are salt and pepper shakers on the table.
After dinner:
  • Put coffee on to brew and boil hot water for tea.
  • Set out the milk or cream and sugar, as well as tea bags.
  • Serve dessert, coffee and after-dinner drinks.
  • If the weather permits, take a walk to enjoy each other's company and digest.

Thanksgiving cheat sheet - Part 1


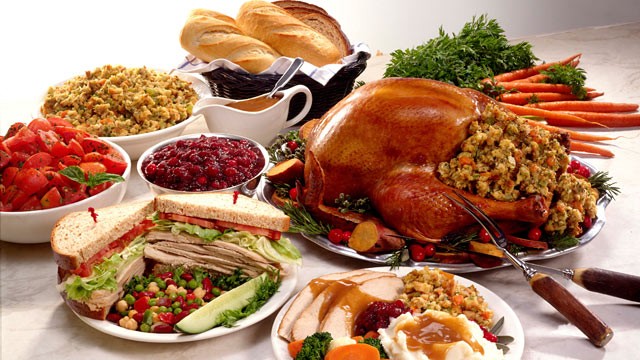
Thanksgiving is only weeks away, and while that may still seem like an eternity to gear up for the big meal, it's time for you to start getting ready. Fortunately, we are here to help every step of the way with this step-by-step guide to planning your Thanksgiving.


Two weeks before Thanksgiving:
  • Make your guest list and invite friends and family you haven't yet contacted. Be sure to ask if anyone has any dietary restrictions.
  • Decide your Thanksgiving menu — consider the number of people you will be entertaining.
  • If you're throwing a potluck-style meal, ask guests if they would like to contribute a special dish.
  • If you are planning to cook a turkey, decide whether you're going with a fresh, frozen or smoked bird. 
  • When selecting a turkey, it can be tricky to figure out exactly what size you need to purchase. Martha Stewart recommends approximately 1 1/2 to 2 pounds per person, but you can also use Butterball's turkey calculator to get a recommended size specific to your guest list. And be certain the bird will fit in your freezer, fridge and oven!
  • Stock up on staples (butter, sugar, flour, eggs) when grocery shopping.
  • Make or purchase bread and rolls and freeze them for later.
  • Purchase disposable supplies, if using, such as paper plates, napkins, cups.
One week before Thanksgiving:
  • Decide on a centerpiece and gather any other tabletop decorations.
  • If you're buying a frozen turkey, purchase it now.
  • Prepare your cranberry relish and store it in the fridge.
  • Select wine to go with your meal.
  • Ask your kids to help organize games for the younger guests.
Thanksgiving week: Monday
Thanksgiving week: Tuesday
  • Iron linens, if necessary.
  • Polish silverware, if necessary.
  • Print out recipes and make sure you have all the ingredients needed.
Thanksgiving week: Wednesday
  • Cut up bread for stuffing. Season as desired and place on cookie sheet(s) in a preheated (then turned off) oven overnight to dry. Store in plastic zip-top bags.
  • Chop vegetables, fruits and herbs for stuffing and seal in plastic zip-top bags.
  • Prepare pies. Cover and refrigerate.
  • Prepare any make-ahead side dishes (roasted vegetables, casseroles). Cover and store in the fridge.
  • Set up an extra table and chairs if more dining space is needed.
  • Chill drinks. If you're short on refrigerator space, store them in a cold garage or out on the porch — or place drinks in a large basin filled with ice and water. 

Friday, October 24, 2014

Mistakes with laundry and how to fix them


Mistakes with laundry and how to fix them


Laundry is (hopefully) a part of your regular routine — but you might be doing it incorrectly.

Here we are breaking laundry down to reveal how you really should be loading the washer, tackling those stains and managing the dreaded chore.

Overloading the machine
When you have a ton of laundry to do, it's tempting to just open up the washer door and stuff everything in. But fight that urge.

You don't want to stuff it, you need the agitation so the water can take the dirt away and clean the clothes. Keep in mind as your sort and load that large front-loading machines can fit 18 pounds while top-loading machines can hold roughly 15 pounds.


Adding too much detergent 
It might seem like the right thing to do to is fill that detergent cup up and pour it in the washer — but it's not.

Don't use too much, It leaves a residue and is not good for your clothing.

Skipping stains
Reach for the stain remover as soon as that spaghetti sauce hits your child's shirt, and letting the remover sit for 20 minutes before tossing the clothing into the washer. 
"Just wet it if anything," if you don't have a stain-removing product nearby.
Dont us bleach as it can often leave yellow stains. Instead trying these DIY options:
  • To tackle sweat stains: Mix two crushed Aspirin with warm water, then let clothing sit in the mixture overnight while the salicylic acid takes care of the stains. 
  • To make whites whiter: Soak whites in lemon water, then lay them out in the sun.
Welcoming wrinkles
Wrinkles are everyone's enemy, but we're letting them happen by leaving our clothes in the dryer after they have been dried, so make sure to take dry clothing out immediately.

If you're too late and need to break out the iron, here are a few tips for getting it done quickly and properly. For pants, turn them inside out to avoid getting the sheen look irons often leave behind. And get ironing done quickly by lining your ironing board in aluminum foil.

It acts as an insulation, So you're actually ironing both sides as you go.